Wednesday, April 27, 2011

Thrifty is good, but free is better!

It's really no secret that I am a bargain hunter, through and through. A pretty good one, even, if I do say so. What's fun is trying to spot the "good stuff" amongst all the junk, whether it's on the shelf at a thrift store, sitting on someone's lawn at a yard sale, or just waiting to be spotted on Craigslist. Generally, when I'm on the hunt I can find something.

Recently, though, I'd been having kind of a dry spell at the thrift stores and while yard saleing. It was a bummer for sure. It's not that I expect to come home with my car PACKED with stuff each time I head out, but visiting 5 thrift stores and coming home with one book for my kids is kind of ridiculous. And don't even get me started on the waste of gas a trip like that is!

Still, I persevere. That's the thing about thrifting- you have to do it often. After one particularly disappointing weekend scouring yard sales, one evening I noticed that the neighbors across the street were moving out, and they'd begun to pile some stuff on the curb by their house. In that pile was a wooden book case, so I sauntered over, decided it was usable (though filthy) and hauled it home.

Over the next few days the pile continued to form, and being directly across the street and having no shame whatsoever when it comes to free furniture, I managed to nab some pretty good stuff! Check it out.

Here's that bookcase, now holding my little boys' stuff quite nicely. I didn't paint it (though I really wanted to), just gave it a good scrubbing and stuck it in their closet with some Ikea buckets that I've had forever.

This is a solid pine dresser that just needs a paint job and some knobs. Oh, and that little wooden heart at the bottom has to GO. But otherwise there's nothing at all the matter with it.

I'm hoping to do something really cool with this headboard. Sorry you can't see all of it.

This must be for a baby doll, and right now it's pretty yucky. It looks like it was left outside for a long time. But I think with some white spray paint and a pretty new ribbon it will be very cute again. I may even have to add a little handmade quilt, too.

This one actually made me squeal and run outside with wet hair to grab it before someone else did.
See, we needed a piano bench, and those are kind of hard to come by without a piano accompanying it. This dining bench, however, will do just as well once I'm able to make it match our piano a little better.

I also had some pretty good luck at a couple of thrift stores this morning. Here's a closer look at the items sitting on my soon-to-be piano bench.

This pretty jar would be fun to fill with brightly colored candy or sea glass or spools of thread or shells or pretty soap or bath salts...

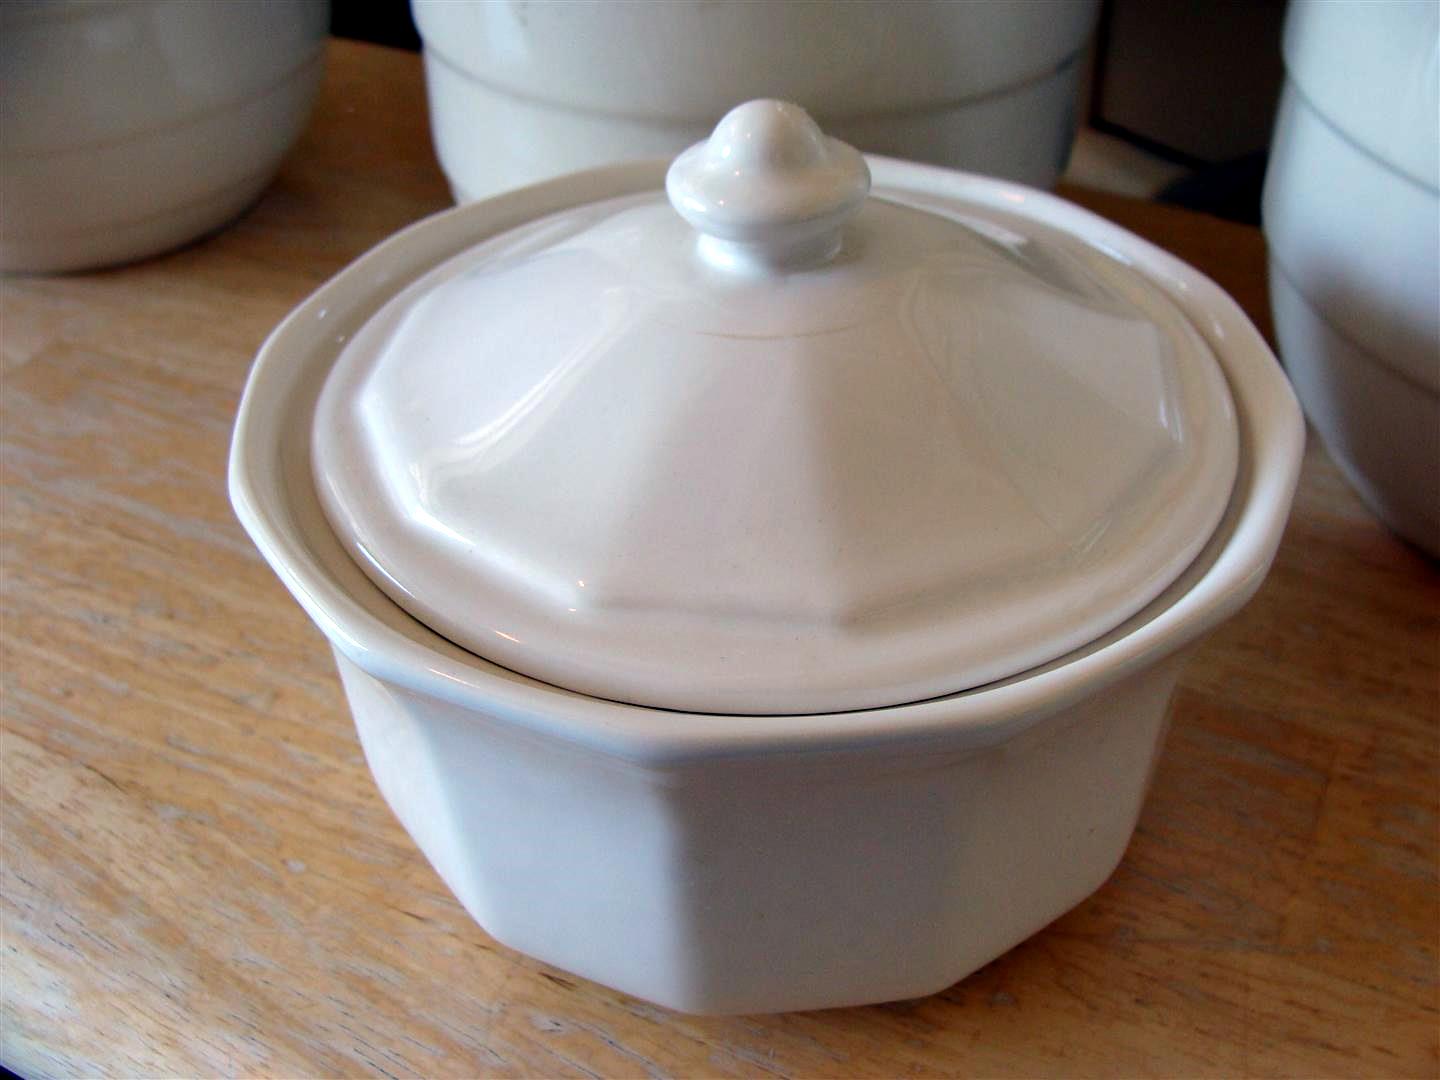
Everyone needs a little white butter tub, right?

I'm loving these three ceramic canisters. Their glaze has that cool crackled look, and I've just never seen anything like these before. They may have to live at my house for a while.

I also managed to find a really BIG lidded jar, a silver pitcher and a glass cloche with a wooden base that will no doubt get painted a pretty blue color in the very near future. Aaaand... I think I might have to keep that pitcher.

Just for fun, here are some more thrifty finds that I've picked up recently that will or already have made it to my space at the store.

I bought two of the wider shutters on the left, and two sets of the skinny shutters on the right (they're hinged together), for a total of 6 really long shutters for just a few bucks. It felt like stealing, I tell you. Fun stuff planned for these as well.

I bought this coffee/tea service at a yard sale and it was black with tarnish. Last night I spent some time using "the good enough" silver polishing method found here and Recipe #2 here. This took some time and elbow grease, but in the end the service got back some of its shine. It's not perfect, but I like it that way.

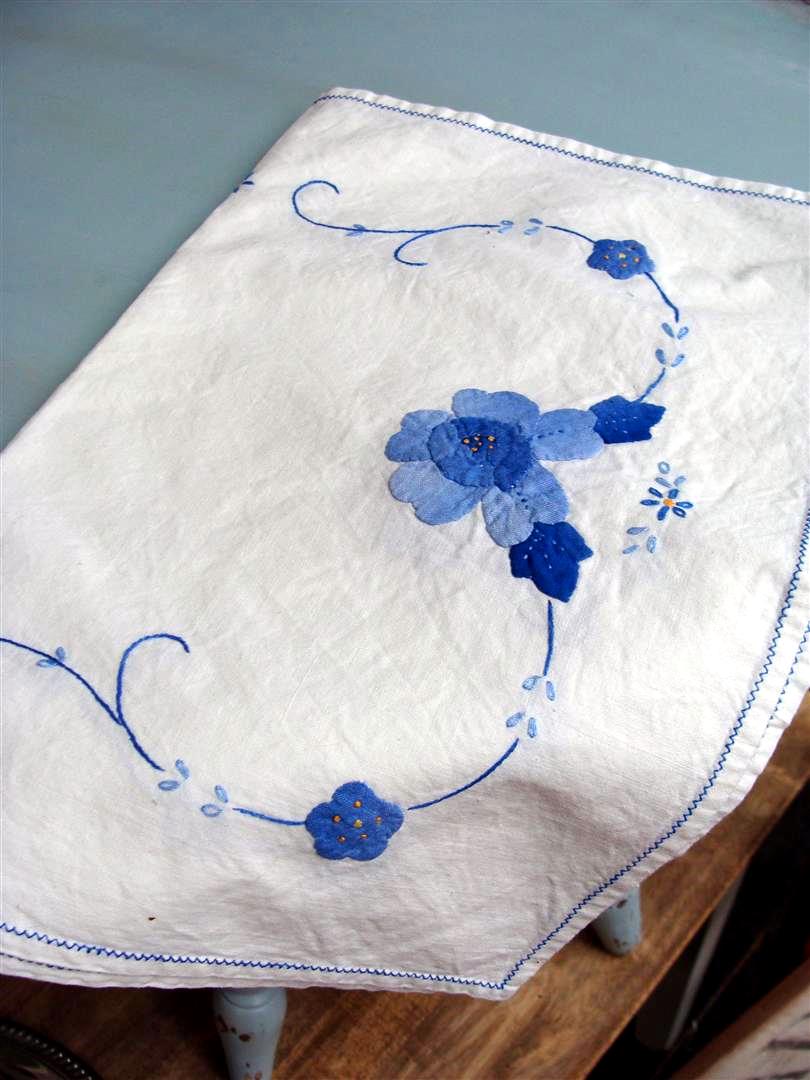
These 3 hand embroidered and appliqued place mats were in such good condition! They're almost too pretty to use.

This little lidded crock caught my eye because of its unusual color. It's less orange in person and more of a vibrant coral or salmon color and super cute.

And how adorable are these sweet scalloped candle holders? Again, I had to force myself to take them to my space at the shop.

My feelings will not be hurt if this kettle doesn't sell. I'm already kind of regretting taking it in, it's just so stinkin' pretty.

And this little guy- well, we all know that I just can't get enough of birds.

My thrifty urge has been satisfied, especially with all that free stuff from the neighbors. Now I know that bellyaching about rotten luck at yard sales isn't productive, but watching the curbs around my neighborhood definitely is!

Friday, April 22, 2011

Tutorial: Hand Painted Rug

Ever since we moved into our current house, I've wanted a new rug for the front room. The one we have is nice and I still like it very much, but with its dark background color and the dark wood floors, it just seems to get lost. It also feels a little too traditional and fussy in there. You can see a peek of it in the photos below.


I did a lot of research online trying to find just the right rug. Of course I found several that I loved, but none that were within my price range. It was then that I started to consider making my own rug. No, I didn't intend to make the rug itself, but I thought that if I could start with an inexpensive, plain rug, maybe I could add the design I wanted myself.

Ikea came through for me on my hunt for a big, plain, inexpensive rug. On my last trip there I bought two of their ERSLEV rugs, which measure about 6'x8', are 100% cotton (washable!), and only cost $40.


I knew from the get-go that I wanted a sort of quatrefoil pattern on my rug, which seems to be a very popular design element right now. I even have a pillow and an oven mitt with similar patterns on them!


This is a photo of some fabric that I found online and used Photoshop to turn it into the design for my stencil.


Here's the finished pattern with the little gaps to serve as "connectors" for when I cut out my stencil. (Be sure you measure your rug's actual width and length to determine the best size for your stencil design.)

Michaels carries plastic stencil sheets and stencil brushes in different sizes. Print out your design, then tape your printed design underneath the stencil plastic. Cut out the image using a very sharp exacto knife, being sure to keep those "connectors" in tact. I traced the outline of my design with a fine Sharpie to be sure I stayed on the edges.


I also found that Michaels had the Fabric Medium that I needed to turn my regular acrylic paint into fabric paint.


To be honest, I used mostly latex paint and a little acrylic to concoct the color I wanted, but hopefully that doesn't matter. I'm not super worried about it since my rug won't be going through the washing machine. I just wanted my paint to be soft and pliable and not stiff and cracked when it dries.


First I practiced my technique on a scrap of fabric, which turned out pretty nice.


I measured my rug and determined where the center was and made my first quatrefoil. Since my rug had a lot more texture to it than the practice fabric, it took more effort to get the paint into all the crevices, but it still worked really well.


You stencil on fabric just like you do on anything else. Pour a little paint onto the lid of your paint container, dip in your brush to saturate (but not soak) the bristles and tap off any excess onto the lid. Pounce the brush straight up and down onto the fabric until it's filled in well. This will make sure the paint stays within your stencil and doesn't creep underneath it. Remember- pounce, don't brush! Keep the stencil in place with a couple of pieces of painter's tape on the sides, and hold the stencil flat to the fabric with your fingertips where you're working.


Be careful if you're doing an all-over design to make sure your rows stay straight. Make guide marks with a water soluble pen if you need to. My rug has an obvious horizontal weave that was easy to follow, so I used that to guide my rows.

I made one row along the horizontal center and another down the vertical center of my rug and worked outwards from there.


This much stenciling took me a couple of hours on my first day. I won't tell you that this is a quick afternoon project, but I'm convinced that the outcome is worth the time and effort.

Away you go. Stencil, and stencil, and stencil...

...and stencil some more...

...until you've covered your whole rug. Then go back with a detail brush and fill in all those connector gaps.


The bottle of fabric medium says to heat set the paint with an iron for 30 seconds, but I chose to skip that step. Honestly, I felt like I'd poured quite enough time into this rug by then, thankyouverymuch.

All-in-all, I'm happy with it. It brightens the room and is a better size than my other rug.
In hindsight:
I wish I'd been braver and used a pretty blue color instead of my muddy gray paint. (But let's not rehash my obsession with neutrals and my risk issues.)

I should have thinned out my paint more with the fabric medium because it still ended up being a little stiff when it dried, but no biggie.

Oh, and if you do mix your own color, mix A LOT. I ran out of paint with about a handful of gaps still left to fill in and had to guess when I mixed the color again. Of course batch 2 wasn't identical to batch 1, but it was close enough.

Finally, don't bother with perfection. It won't be perfect and expecting it to be will just make you nuts. So if you take on this project, embrace it's imperfections, enjoy the process, and pat yourself on the back for making something custom on the cheap!

Monday, April 18, 2011

Adding a punch of color

Sometimes- okay, MOST of the time- when I'm decorating a room, I go with what's safe. I choose the neutral over the bold, the simple over the fun, the standard over the risky. These choices make my decor flexible (or at least that's what I tell myself), because I like to change things up so often. A robin's egg blue couch or some bold, graphic curtains would be really fun and would make quite a statement, but what happens when I get tired of it and want something different? Then what? My thrifty-minded self just can't justify making bold choices now that may cause expensive consequences later.

However, lately I feel the need for some bolder color in my life. I've started in my kitchen with the introduction of this little step stool that I picked up at the store where I sell my furniture. I couldn't resist the chippy paint and its functionality. And while red doesn't appear ANYWHERE in my house, I still had to have it. It wasn't until I saw it next to the aqua color that I chose for my island that I realized--these two colors actually look good together. Who knew?! So I set out on a quest to inject more of that cheerful red into the room with a few more little accessories. I had this big bulletin board above my craft desk at our old house, but since moving here it hadn't yet found a home. I also ran into trouble finding a good spot to post my calendar since our new refrigerator isn't magnetic on the front (??!!?) and that's where it's always lived before.

Luckily, Emily at Jones Design Company came to the rescue with the perfect tutorial for how to transform my sad, shabby bulletin board. First, it got some white primer and a coat or two of Rustoleum's "Colonial Red". I didn't have a good 'before' photo, but trust me when I say that this was a major improvement! I followed Emily's instructions and covered the tattered cork with woven strips of burlap, then covered my staples by gluing some thick jute rope around the edges. It's the perfect spot to hang my calendar... ...and to tuck other pretty little things that I might find. And soon it will be full of precious artwork, like this one. Another little project I decided to try was to make our last initial out of a fence picket that I had in the garage. I cut it down, sanded it really well, then glued and nailed the pieces together to form an "H". Then it too got primed and painted with "Colonial Red" and heavily distressed.


Looks right at home above my kitchen cabinets, doesn't it?


By the way, how is it that I never showed you my island with the stools and support leg that I added? I've yet to put handles on the middle drawers or even put anything in the baskets underneath, but even so this thing gets used a TON. I never realized what a work horse it would end up being!

There are sure to be more projects coming up that will strengthen the red and aqua theme I've got going in my kitchen, and I'll be sure to share as they get finished.