Monday, August 29, 2011

More Fall Decor Projects

I've got another installment of "Sarah's Fanatical Fall Craft Frenzy" here for you today! (Okay, that was corny, but I just can't help it.)

Here's another hand painted banner that was super quick and easy to make.

For a little more charm I added some tassles of ribbon, yarn, lace and string to each side of the word.

For this wreath I followed a tutorial given by Emily at Jones Design Company. Her ruffles seem fuller than mine, though. Hm. I may have to give this one another try.

Then came the fun part- embellishing! I looked through my stash of scraps and do-dads to see what I could find and had a really good time putting together 3 little rosettes using different materials.

Here's a closer look at each one. This one is made from cotton crochet trim purchased at Joann, a cotton yo-yo, a mother of pearl button and some burlap string.

Next we have a burlap base with some scrap lace and a wool felt center.

This one has a base cut from a felted wool sweater, some lace trim and a cashmere rose and burlap string in the middle.

Maybe it's not very fall-ish, but it looks kind of romantic and I like all the natural colors and textures on it.

Finally, this was an idea I'd seen on Betz White's blog a while back and finally got around to making a couple.

The doily and spider (2 pack) came from the Dollar Tree and the hoop is something I always seem to have around. I just need to pick up some black ribbon for hanging.
Cute and creepy!

Saturday, August 27, 2011

Tutorial: Book Page Fall Leaf Garland


This project is so simple, I almost feel silly making a tutorial for it. But I was describing it to a friend over the phone and she seemed interested in making one of her own. Maybe some of you might be interested, too, so here ya go!

Supplies:
old book
scissors
pencil
hole punch (1/8" is best)
twine, string or yarn
tape

Start by carefully tearing out 3 or 4 pages from your book at a time.

Fold them in half lengthwise, all stacked together.

Trace or draw half a leaf shape onto the folded paper, with the center of the leaf on the fold. Depending on the size of your pages, you can probably fit at least 2 leaf shapes to each stack of pages. (You can skip this step if you want to just free-hand cut your leaves.)

Cut out the leaves.


Keep the leaves folded and punch a hole close to the "stem" end of the leaves.


Wrap some tape around one end of your twine or yarn to keep it from unravelling and to help it go through the holes easier.

Feed the twine through the holes at the tops of your leaves. If you're using various shapes of leaves, alternate them or string them on randomly for a more organic look. You can also alternate having the folds facing up or down if you want.
Thread enough of the leaves onto the twine (spaced evenly) until your garland is the length that you want it to be.

Hang and admire!


Thursday, August 25, 2011

Before and After: Ladder-back Chair + Fall Decor

I feel like kind of a slacker lately. I haven't been feeling very well for a couple of months and it's taken its toll on my furniture refinishing motivation. Truth is, I haven't really felt like doing much of anything for what feels like an eternity, so I have to force myself to get things done a little at a time.

So, I only have one "before and after" for you today, but I'll also share a couple of the fall decor projects I've been working on.

This chair came from a thrift store and was in great shape, just looking kind of sad and well, ugly. I knew right away what I was going to do with it. (I love when that happens!)


It was begging to be black.

I'd had this idea for a seat cushion for a few weeks and this was the perfect chair for it. I bought some old doilies at a thrift store and first glued them to my taupe linen fabric.

After the glue dried I used matching thread to stitch each one securely to the fabric so they won't come off.

A few embroidered leaves add just a little more detail and finishes it off sweetly.

Makes me wish I had some black furniture in my house...

My space at the shop is going to be sporting some new fall and Halloween decor soon, and the crafting bug has bitten me hard. The past couple of days have found me parked in front of the TV watching "Monk" on Netflix while I craft and craft and craft. So far I've made 3 wreaths, 2 hand painted banners, 2 garlands, and 2 little Halloween projects. It's been so much fun! Anyway, I won't inundate you with all of them at once, so here's a look at one of the wreaths and banners.

This wreath is built on one of those flat wire forms that you'd find in the floral section. I think they're for making memorial wreaths. The one I used is about 18" wide, so it's a pretty big one.

I cut my burlap strips nice and wide, probably about 6" or so and gathered them into ruffles. I hot-glued each one end to end onto the wreath form until the whole thing was covered.

Next I added a narrower strip of ruffled wool felt and embellished it with some other little found fabrics and fall-ish objects.

It still needed a little something, so I made a tiny "welcome" banner that I strung across the middle.


Looks pretty fall-ish to me- don't you agree?

Okay, so this next project can't exactly be categorized as "fall decor", but I'm pleased with how it turned out so I'm going to share it anyway.

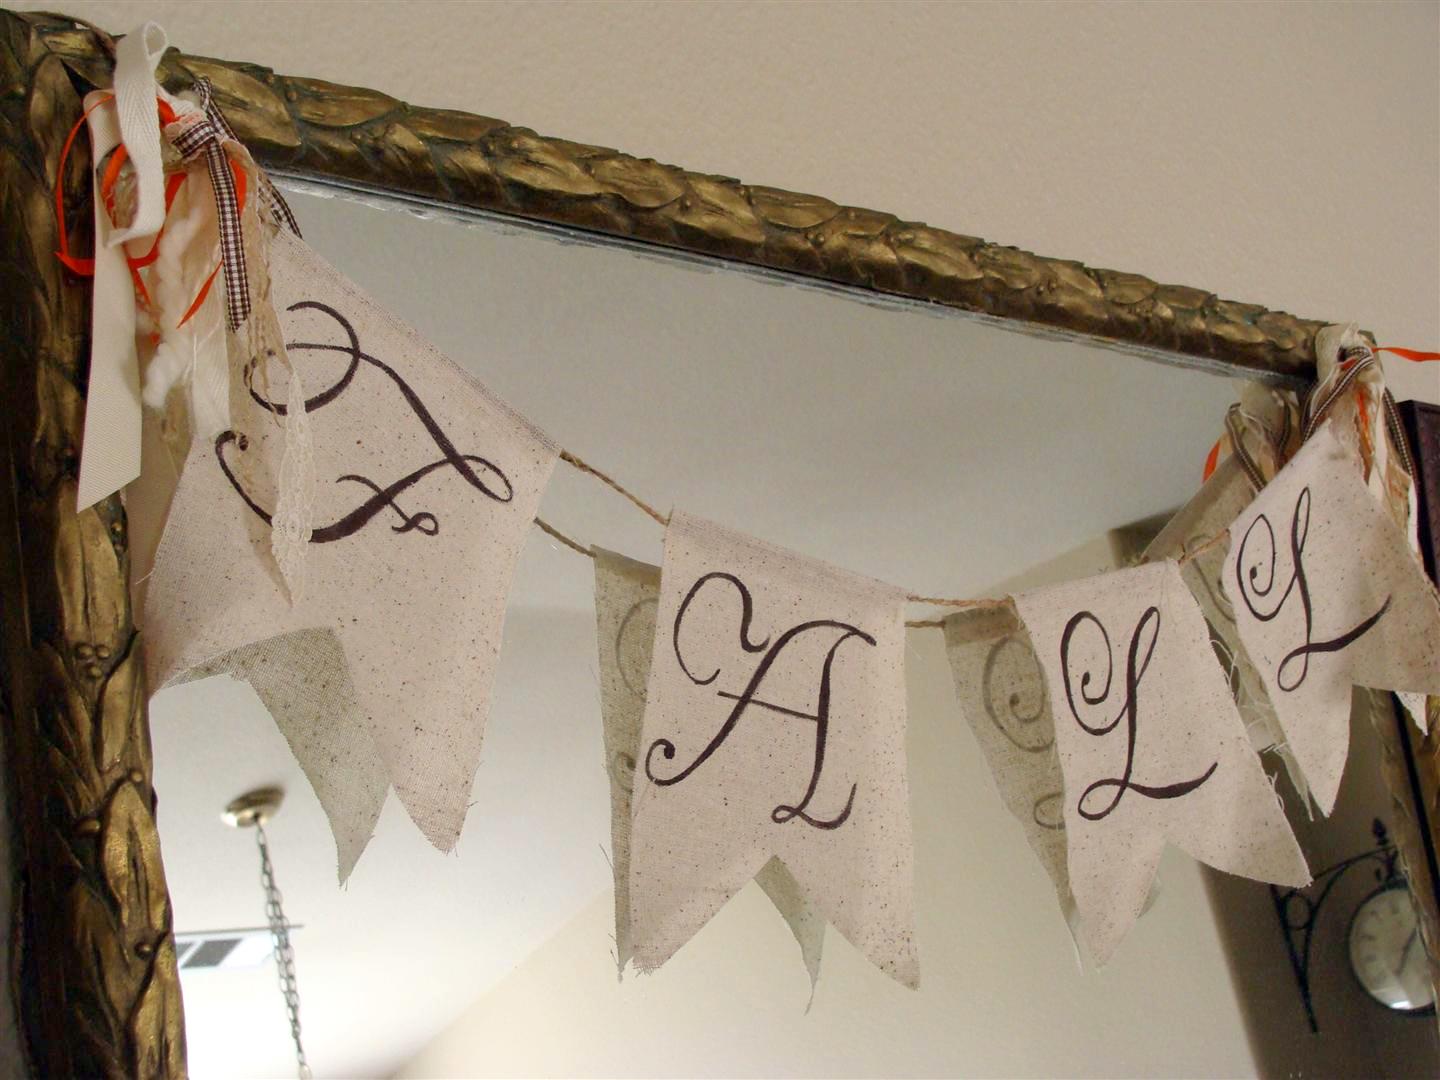
This is one of the hand painted banners I made using Miss Mustard Seed's tutorial found on HGTV.com.

I love the one she has hanging in her space (seen here), so I tried making one of my own.

This is a tutorial you really ought to try. It doesn't require any special equipment or talent, just tracing, filling in and gluing. Seriously- suuuuuper easy.


There's plenty more fall and Halloween projects coming- I promise!

Wednesday, August 3, 2011

Before and After: Nighstand, Dresser and (another) Chair

This little nightstand was listed for sale on Craigslist along with the dresser that I'll show you next. They're not a pair, but I decided to paint them similarly so they could go together.

They were both sort of a dirty white color, and both weathered in an ugly way, but they each had nice lines and cute hardware which made them seem worth revamping.

The top of the nightstand was some kind of pressboard, covered in that shiny plastic laminate that you see on lots of this kind of furniture. I sanded the laminate really well and proceeded to prime and paint the whole thing Heirloom White.

The little cubby got a coat of pretty blue and then I glazed everything to bring out the details.

As much as I love a good chippy piece of furniture, this little chest of drawers just didn't have the look I want when it comes to a natural distressed finish. The paint was chippy alright, but for some reason it looked less charming and more neglected and sad. This is what it looked like after I'd already started to sand it.

That paint just kept wanting to come off, so it took a while before I finally got it ready to paint. It too got primed and painted Heirloom White, then glazed with dark brown to finish it off.
I forgot to take a picture of it, but I also lined the drawers of each one with a cute polkadot contact paper that I found at Target. Good little trick to cover up stained or ugly insides of drawers.


You know me and chairs. There's bound to be a chair hanging around waiting to be redone.

This one got primed then painted with a pretty slate blue spray paint, then distressed quite a bit.

I used the same technique for a hand painted bird detail that I used on this chair a while back. SUPER easy.
I was hoping to have another "before and after" to include in this post but it turns out that I forgot to take the "after" photos before it sold. I hate when I do that! Guess I'd better get going on some more stuff, then, huh?